Serverless web application Deployment using AWS Lambda
Resources used :
IAM |S3 bucket | DynamoDB | Lambda | API-Gateway
Steps:
Step 1: Create an IAM role for Lambda services having Admin permissions
Step 2: Create S3 bucket and upload Code files for frontend
Step 4: Create lambda function1 (GET)
Step 5: Create lambda function2 (INSERT)
Step 7: Link API to Lambda functions
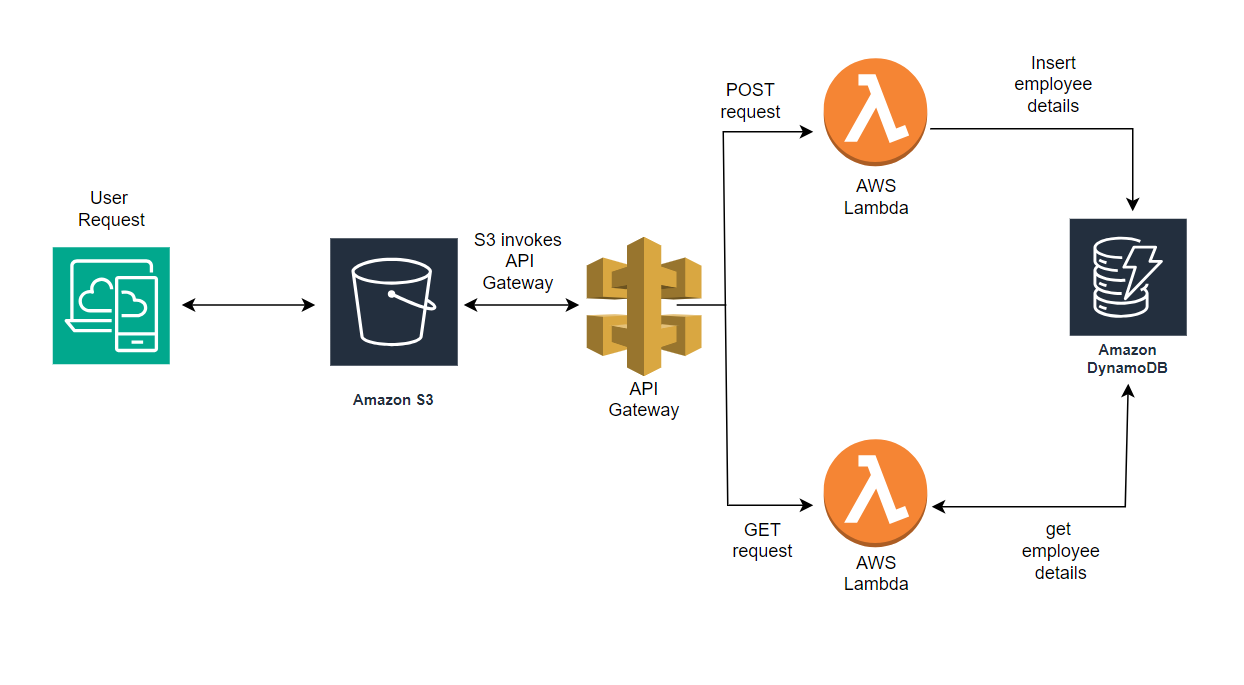
In this setup, a user accesses a service through an S3 URL to insert or fetch data from a database. The user request is processed by an API Gateway. The API Gateway then routes the request to specific Lambda functions based on the requested service type. Depending on the nature of the user’s request, the corresponding Lambda function is invoked. These Lambda functions are designed to handle distinct tasks—either posting data into the database or fetching data from the database. This serverless architecture, orchestrated by the API Gateway and Lambda functions, provides a flexible and scalable solution for handling diverse user requests with secure credential-based access to database operations.
Step 1: Create an IAM role for Lambda services having Admin permissions
IAM >> Roles >> Create role >> Select AWS Services — Lambda service — Next >> select Administrative Access — Next >> Provide name to the role(lambdarole) >> Create Role
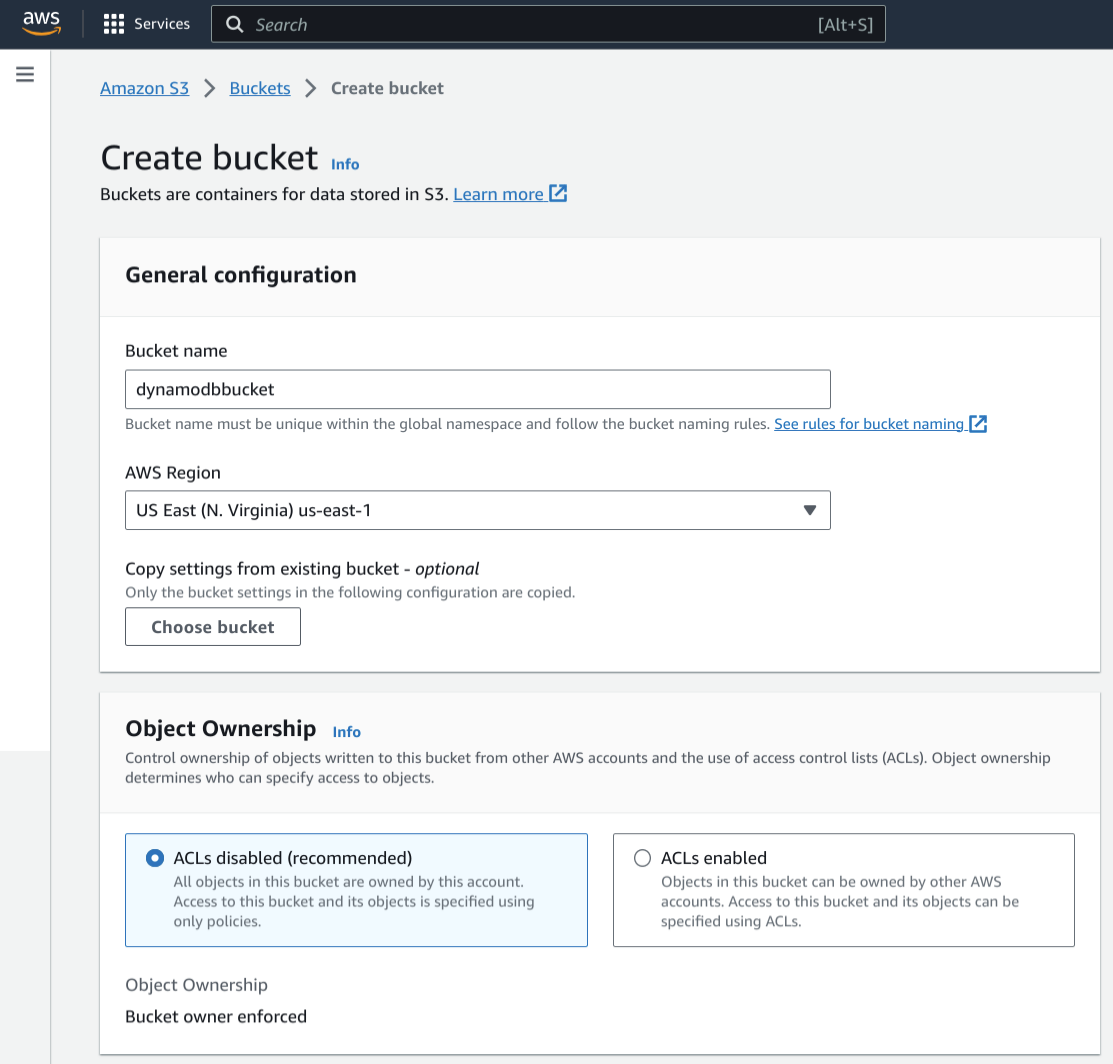
Step 2: Create S3 bucket and upload Code files for frontend
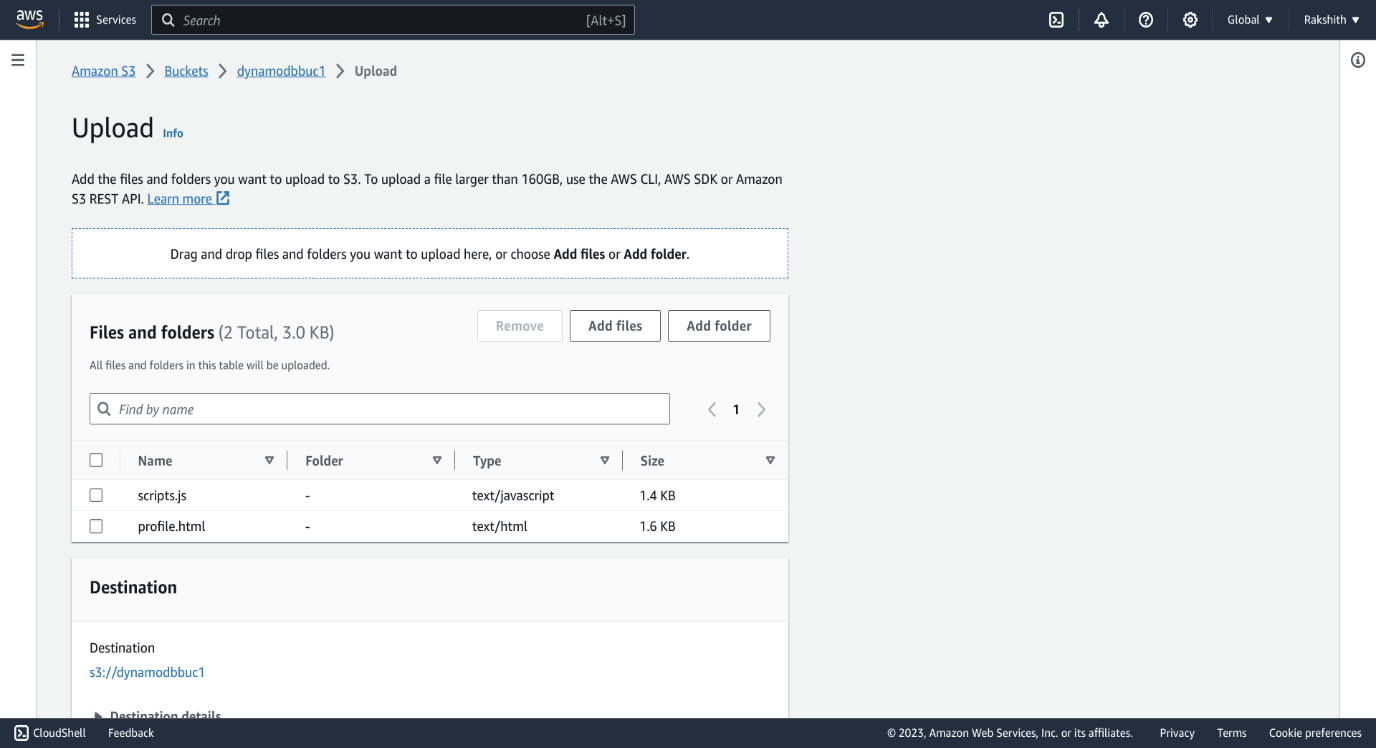
Download below zip file containing two files and upload it in the s3-bucket.
1)All services >> S3 >> Create bucket
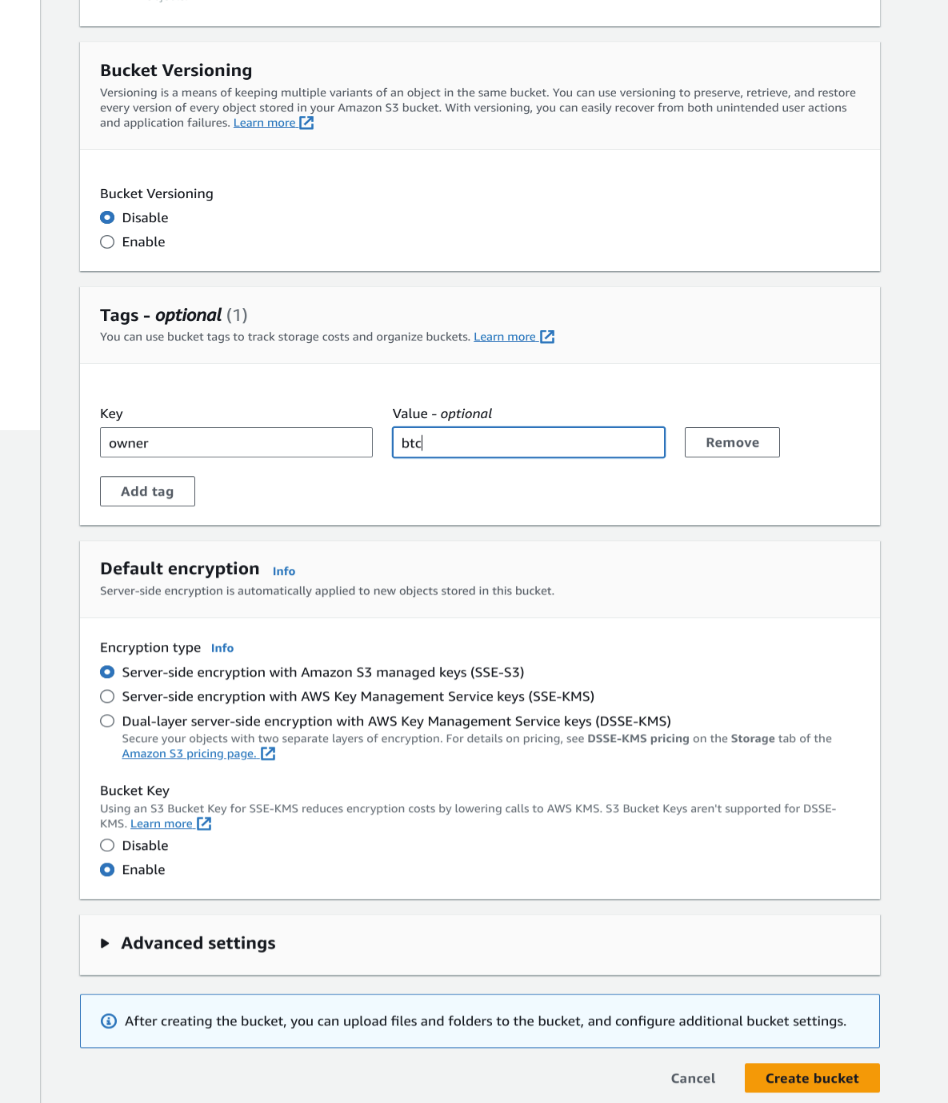
Name–dynamodbbucket >> tags-add and make sure bucket is Publicly accessible #Name should be unique
2)Upload Code files to S3 bucket
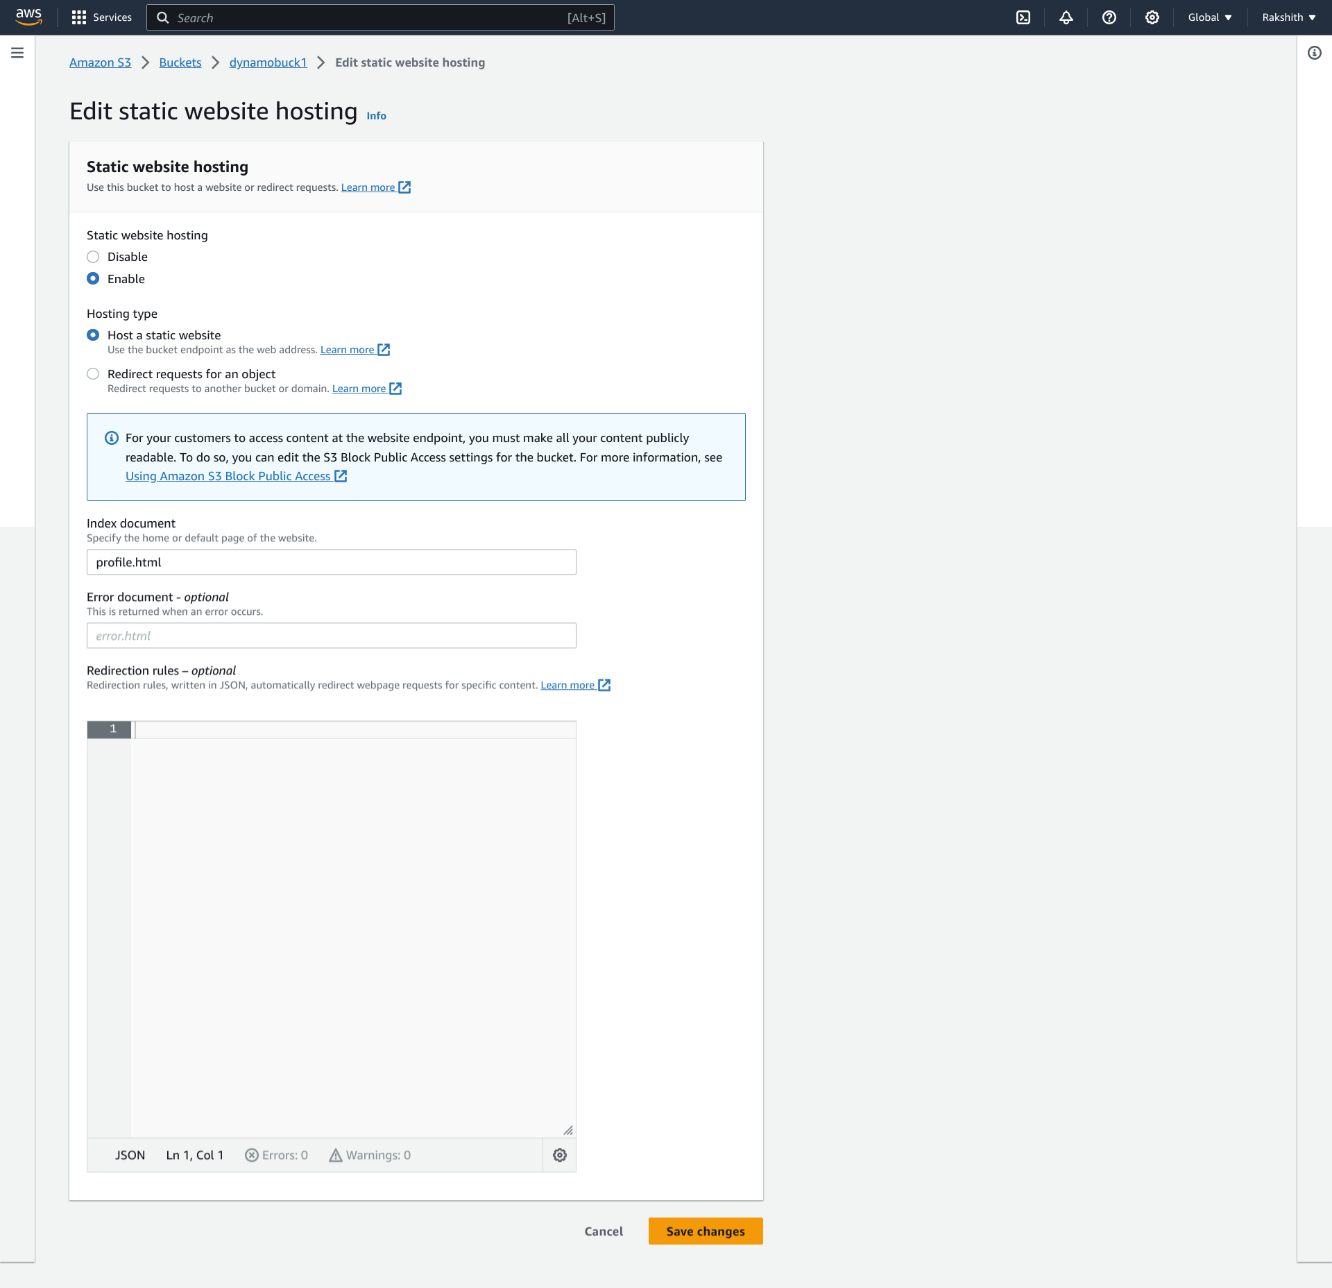
3)Website hosting
Amazon S3 >> Buckets >> Dynamobuck1 >> Properties-Sections – Edit static website hosting
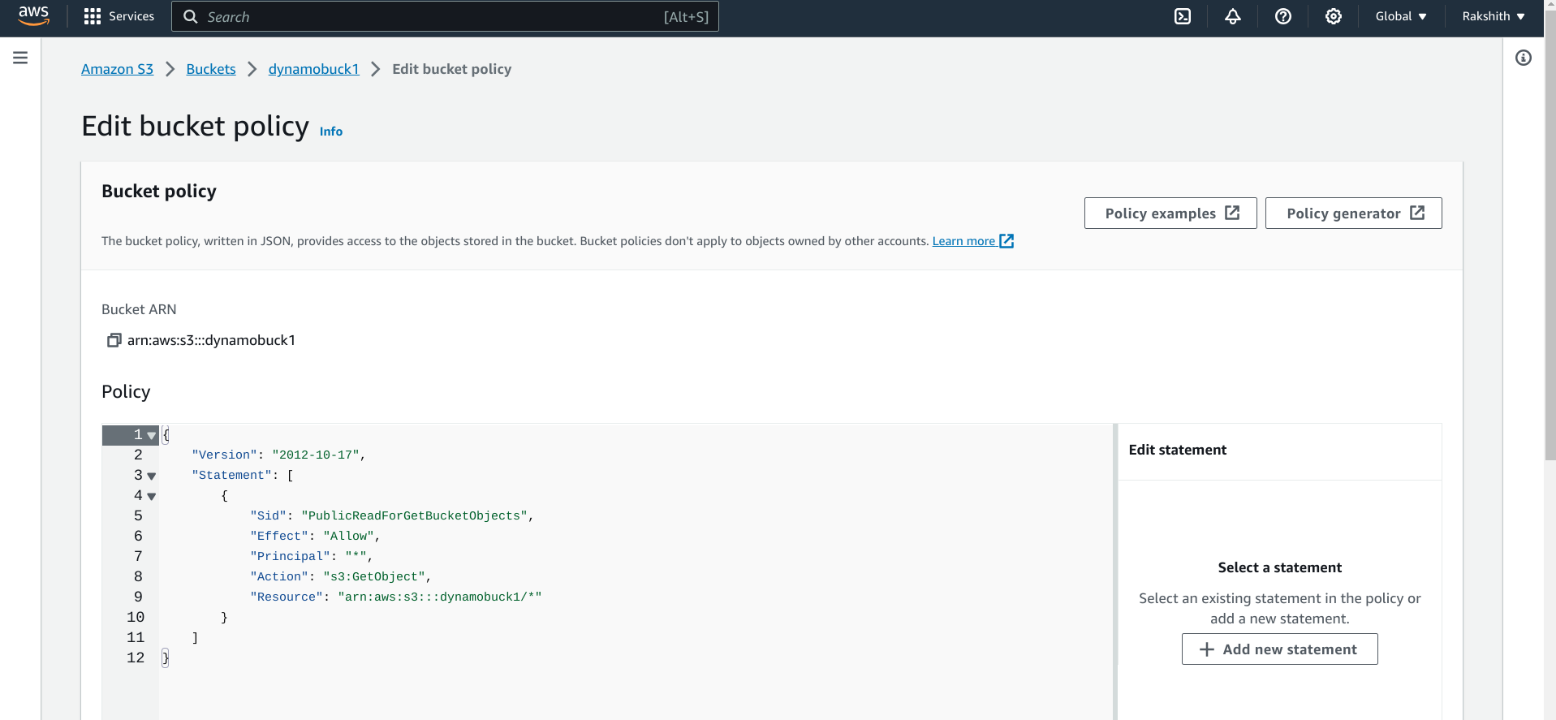
4)Edit Bucket policy
Amazon S3 >> Buckets >> Dynamobuck1 >> Edit bucket policy
Paste the below code
{
    "Version": "2012-10-17",
    "Statement": [
        {
            "Sid": "PublicReadForGetBucketObjects",
            "Effect": "Allow",
            "Principal": "*",
            "Action": "s3:GetObject",
            "Resource": "arn:aws:s3:::dynamodbbucket/*"  #Replace dynamodbbucket with your bucket name
        }
    ]
}
Backend
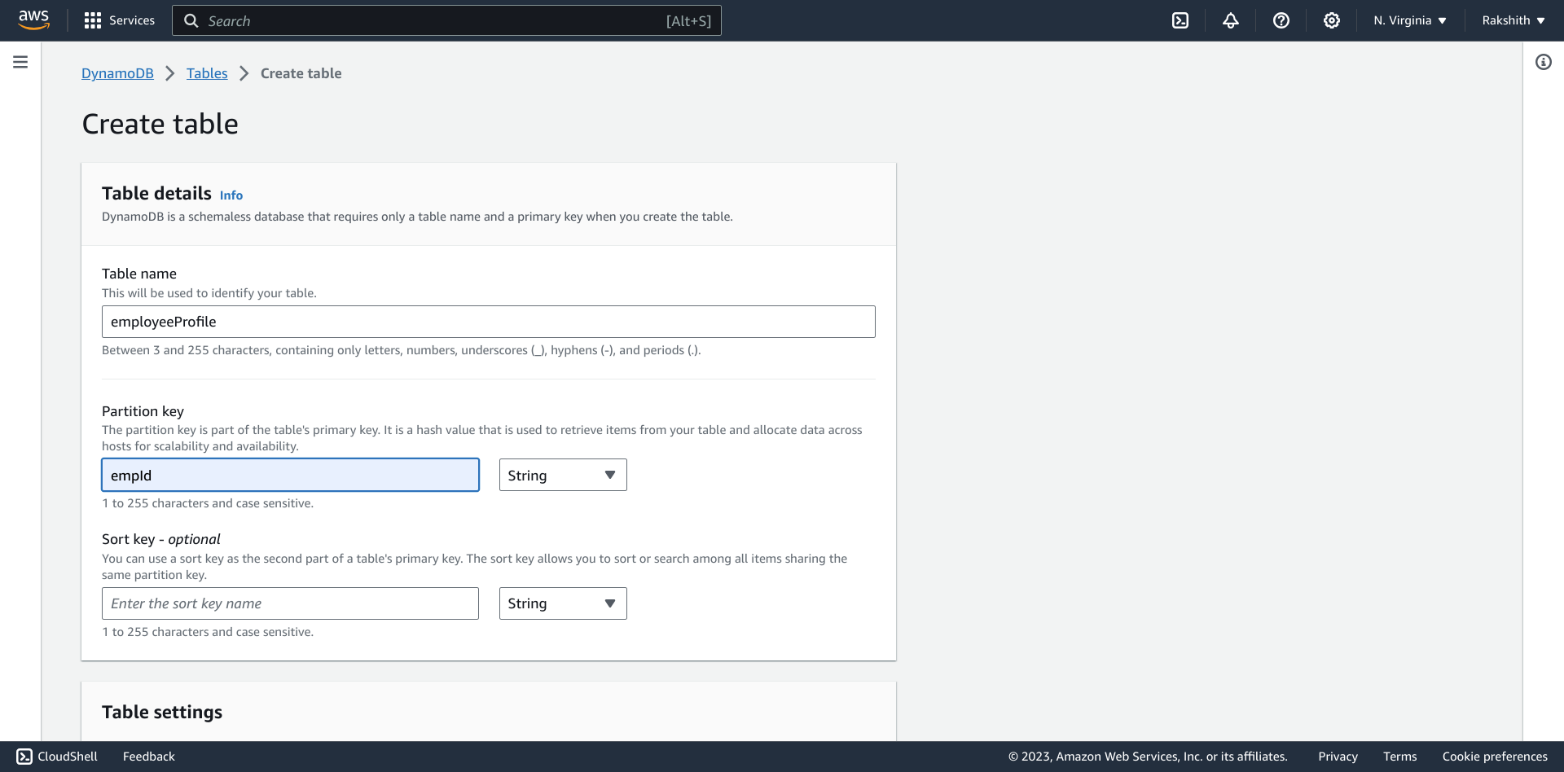
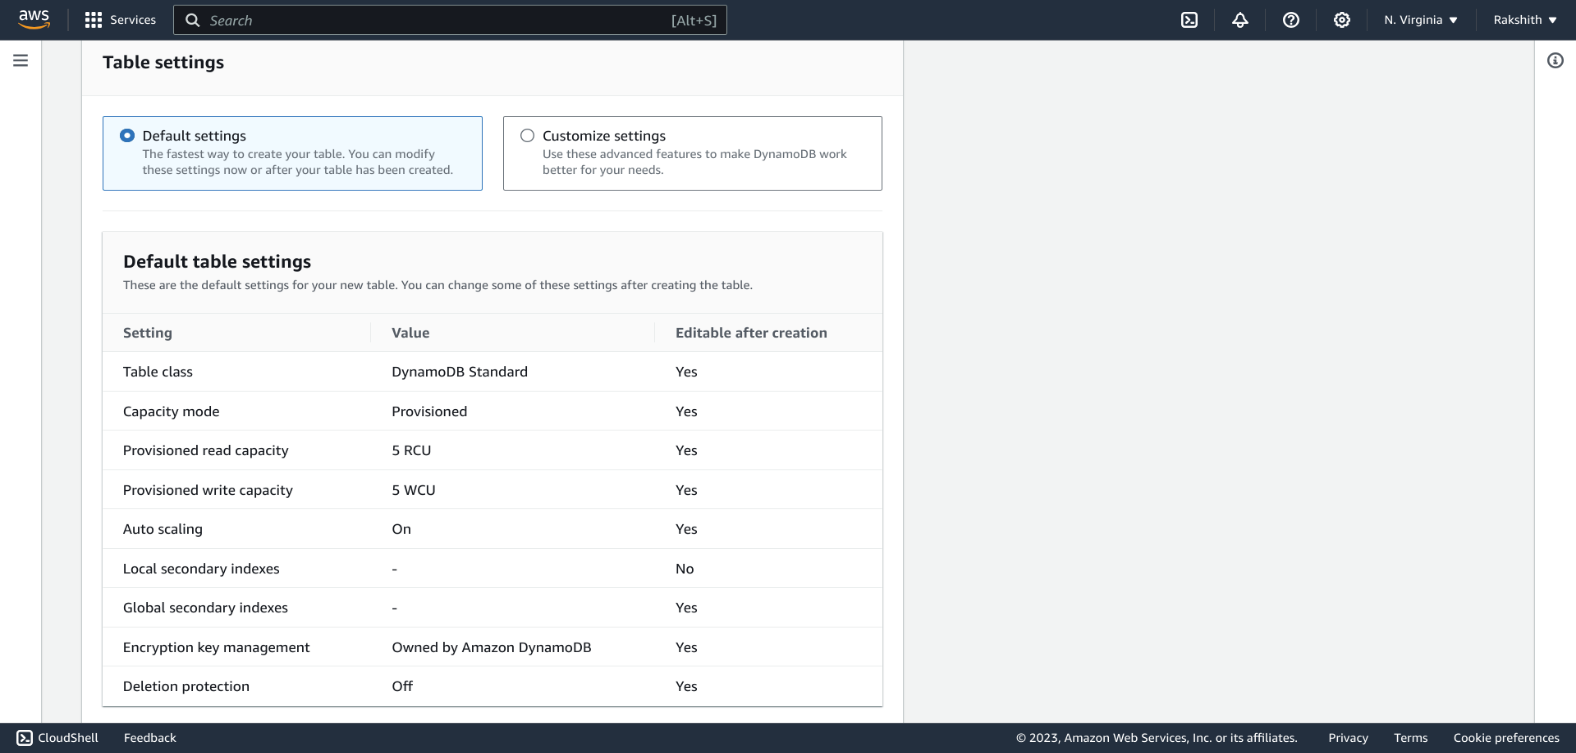
All services >> DynamoDB >> Create table
Step 4: Create lambda function1 (GET)
1)All services >> Lambda >> functions >> create function with getEmployee and choose “use an Existing role ” created in step1(lambdarole) in this case and follow the snapshots

2)Goto code section of Lambda function created
paste the below code, deploy and test
import json
import boto3

def lambda_handler(event, context):
    dynamodb = boto3.resource('dynamodb', region_name='eu-central-1')  #Replace 'eu-central-1' with your region name

    table = dynamodb.Table('employeeProfile')

    response = table.scan()
    data = response['Items']

    while 'LastEvaluatedKey' in response:
        response = table.scan(ExclusiveStartKey=response['LastEvaluatedKey'])
        data.extend(response['Items'])
    return data
Test — Configure test event without making any changes
Step 5: Create lambda function2 (INSERT)
1)All services >> Lambda >> functions >> create function with insertEmployeeData

2)Goto code section of Lambda function created
paste the below code, deploy and test
import json
import boto3

# create a DynamoDB object using the AWS SDK
dynamodb = boto3.resource('dynamodb')
# use the DynamoDB object to select our table
table = dynamodb.Table('employeeProfile')

# define the handler function that the Lambda service will use as an entry point
def lambda_handler(event, context):
# extract values from the event object we got from the Lambda service and store in a variable
    firstname = event['empFirstName']
    id=event['empId']
    lastname=event['empLastName']
    age=event['empAge']
# write name and time to the DynamoDB table using the object we instantiated and save response in a variable
    response = table.put_item(
        Item={
            'empId': id,
            'empAge':age,
            'empFirstName':firstname,
            'empLastName':lastname
            })
# return a properly formatted JSON object
    return {
        'statusCode': 200,
        'body': json.dumps('Hello from Lambda, ' + firstname)
    }
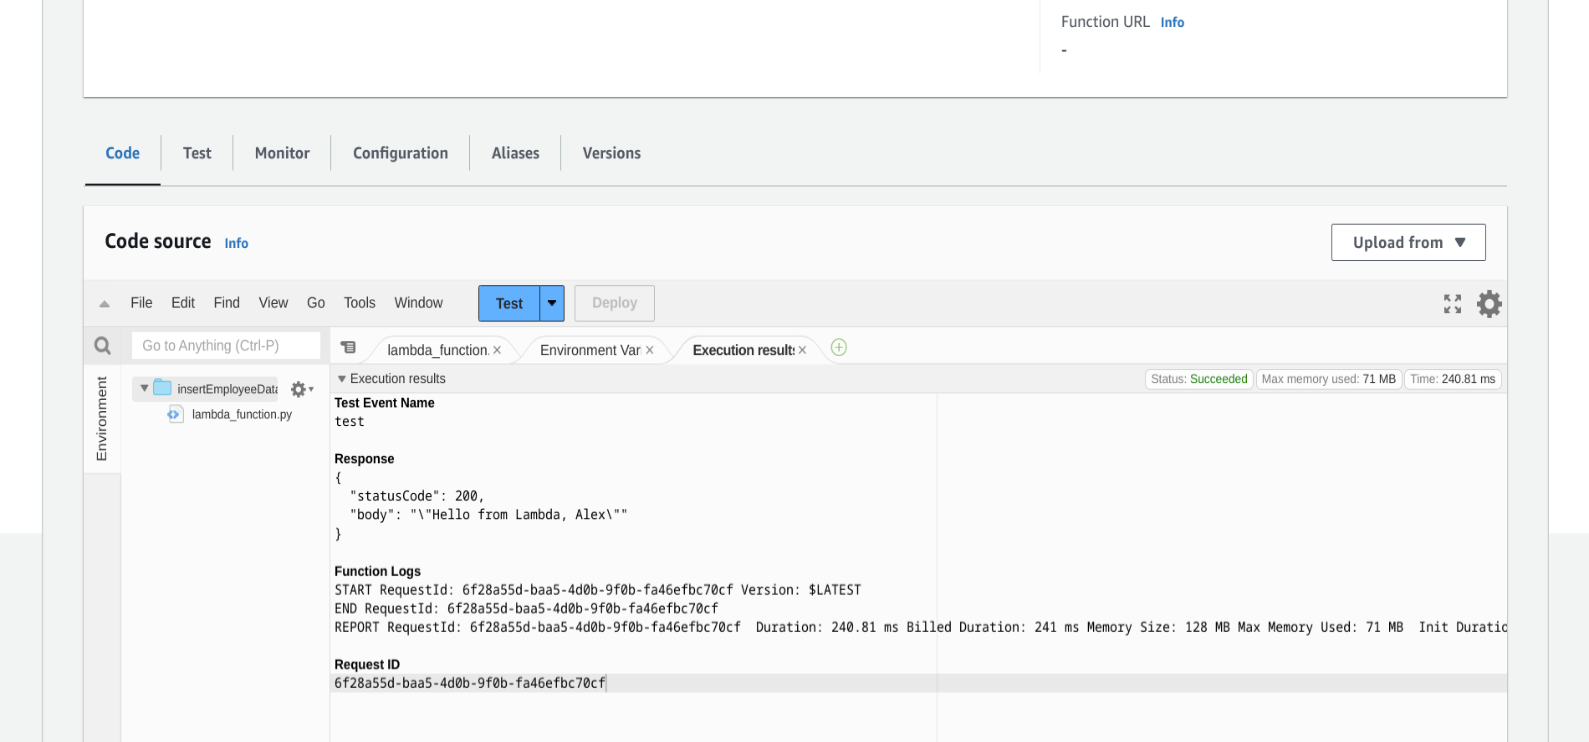
Test — Test — Configure test event with making any changes as shown below
paste below code in test
{
  "empId": "001",
  "empAge": "34",
  "empFirstName": "Alex",
  "empLastName": "Holth"
}
now test and the emp will be created in Table,you can verify in DynamoDB console
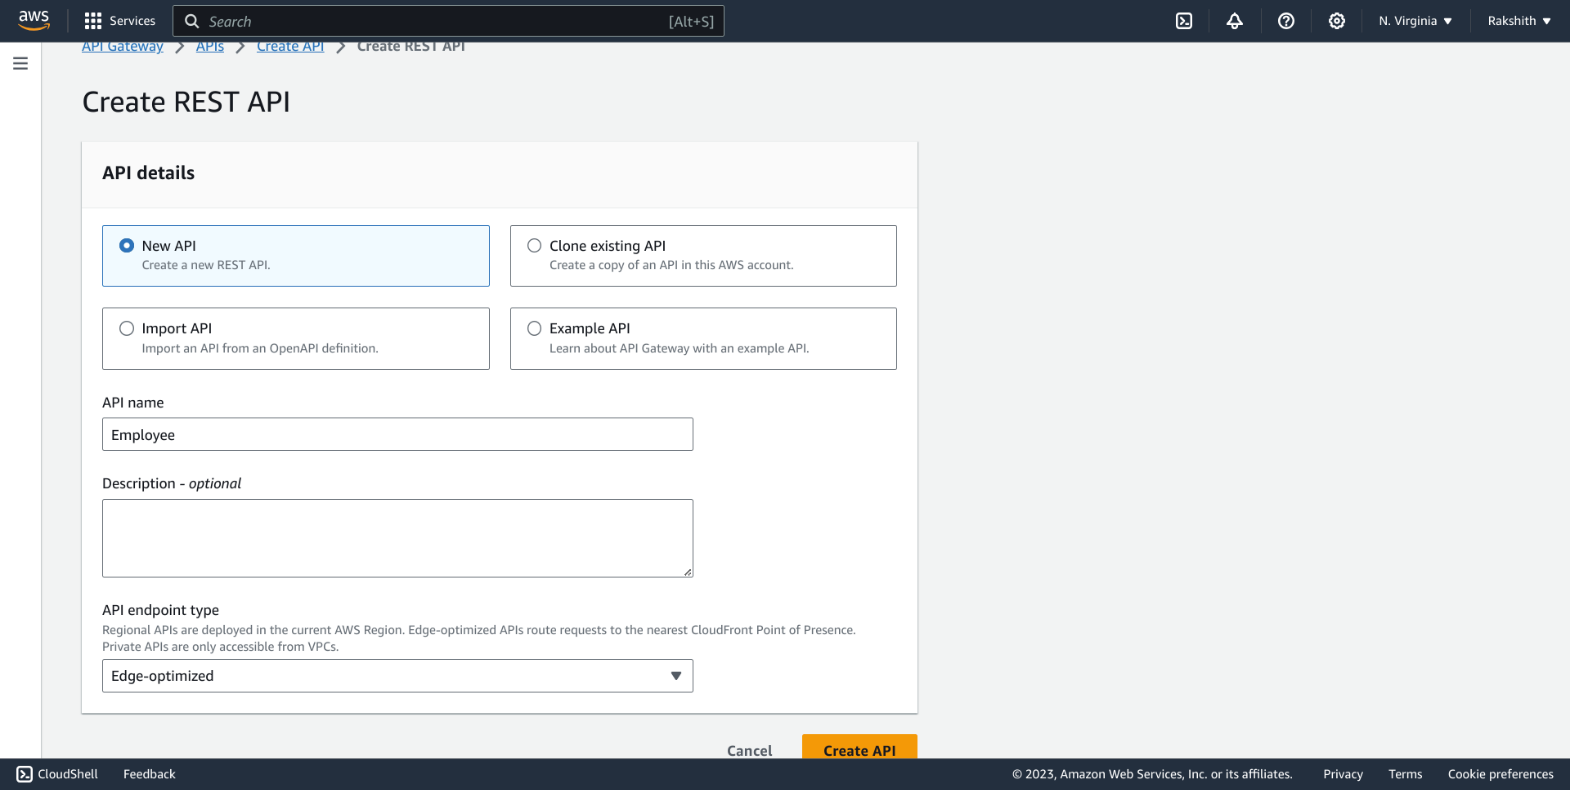
Integrating frontend and backend
All services >> API gateway >> Rest API >> Build
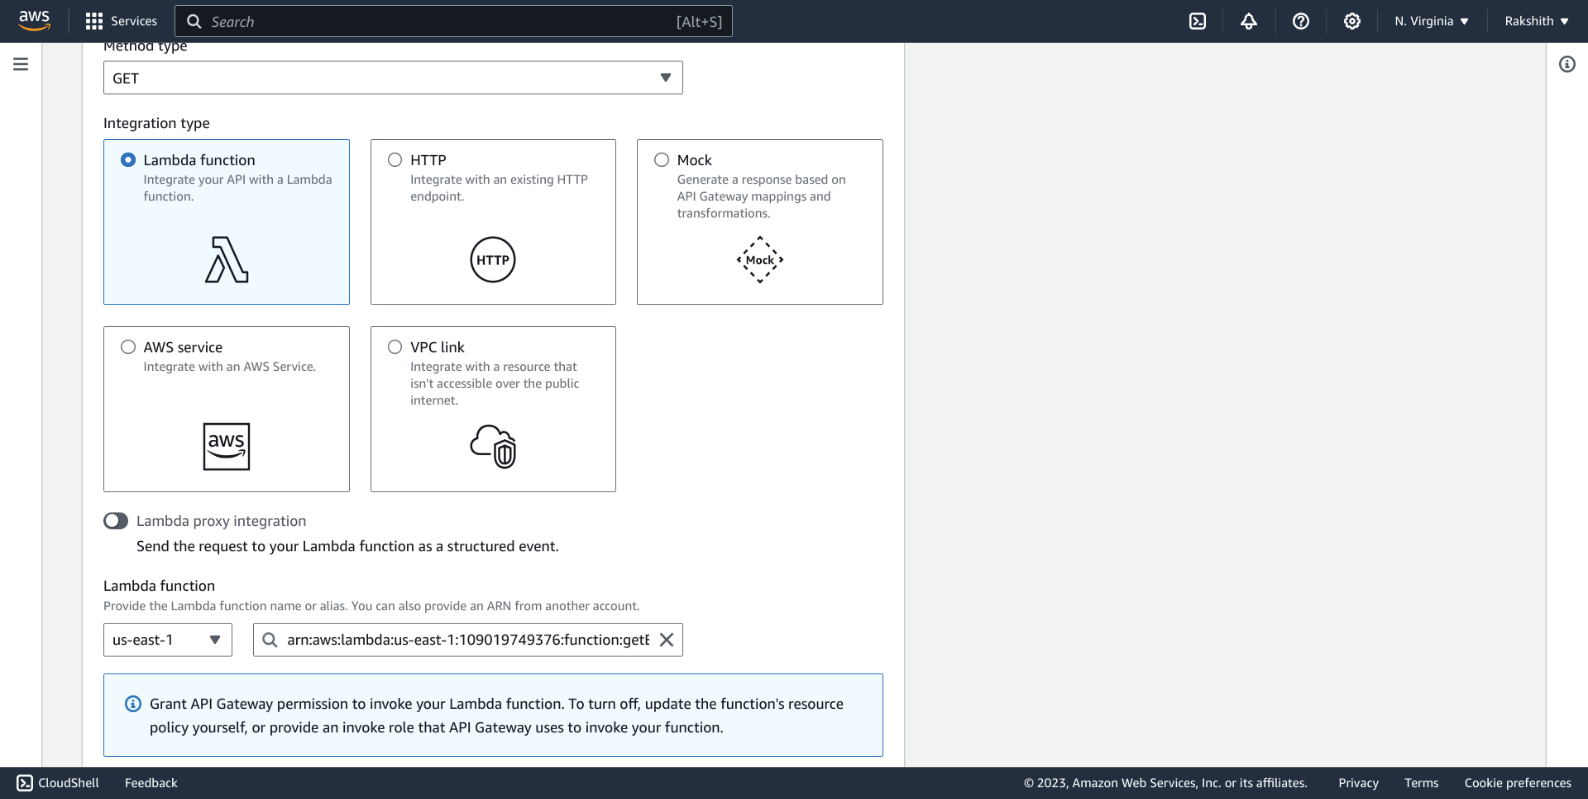
Step 7: Link API to Lambda functions
1)create a method for GET
Select API >> Create method with getEmloypee lambda function
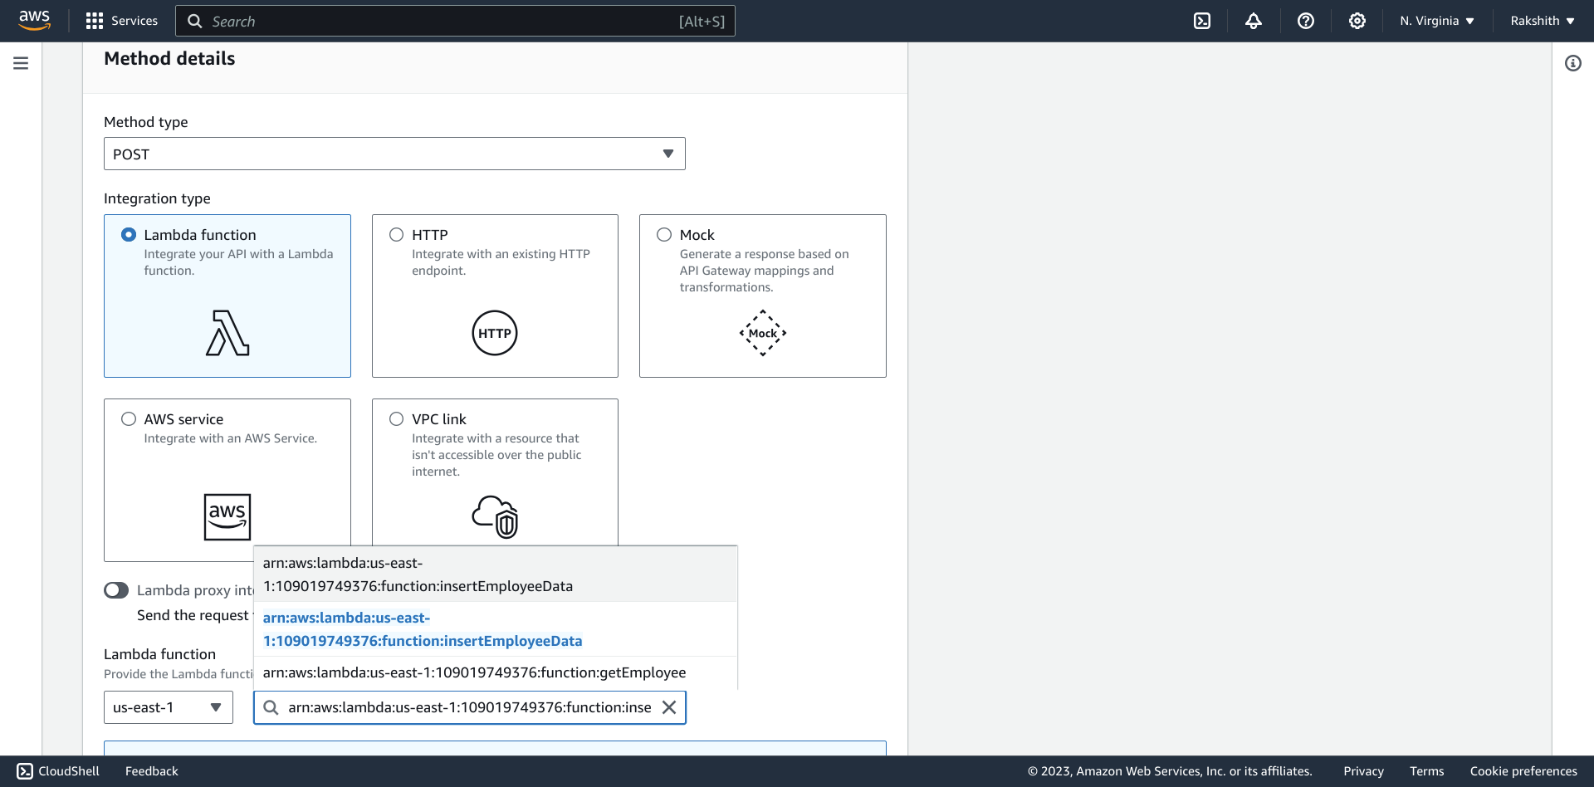
2)Create a method for post
Select API >> Create method with insertEmployeeData
3)Now deploy API gateway
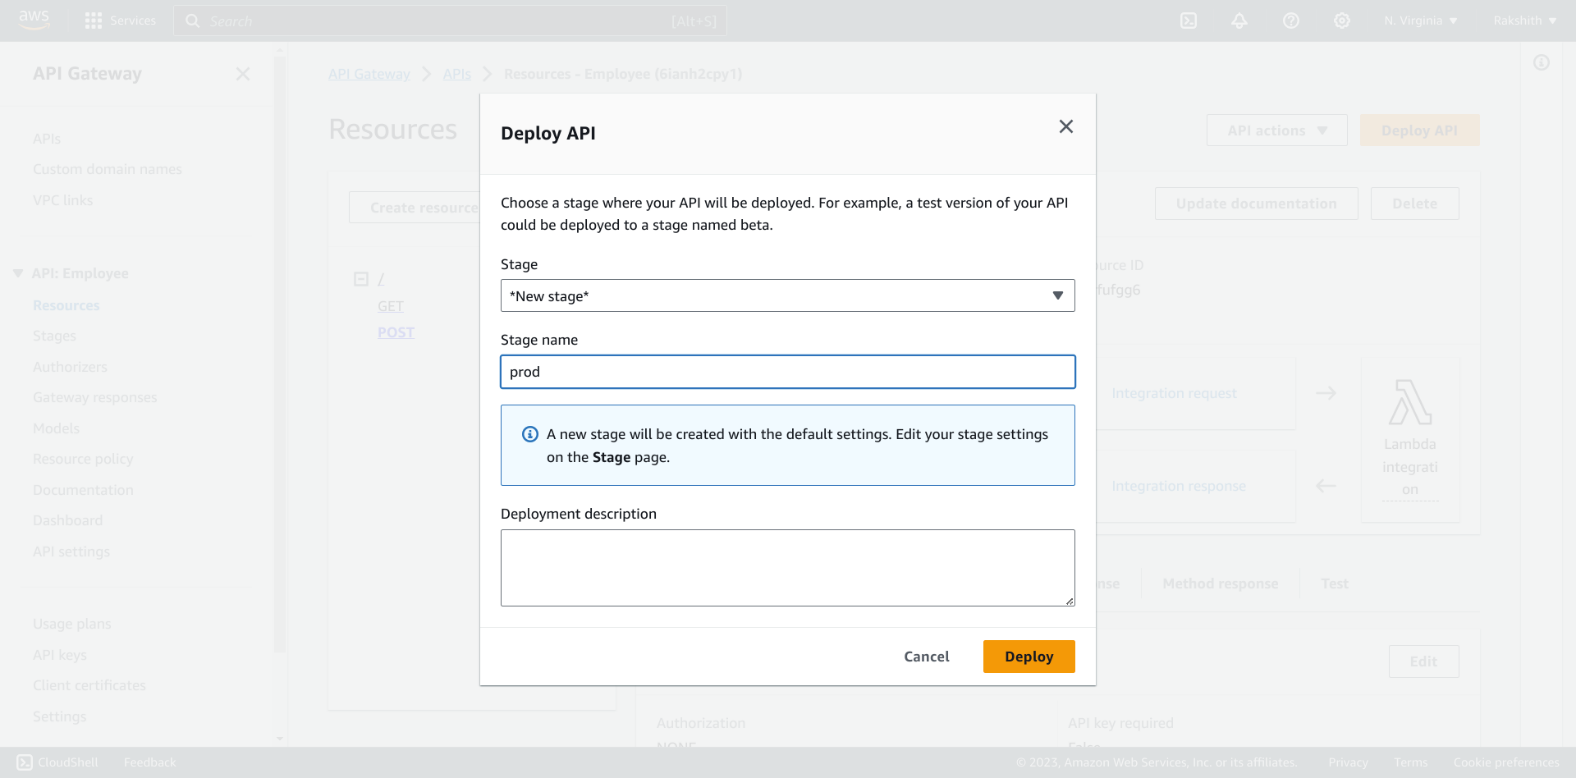
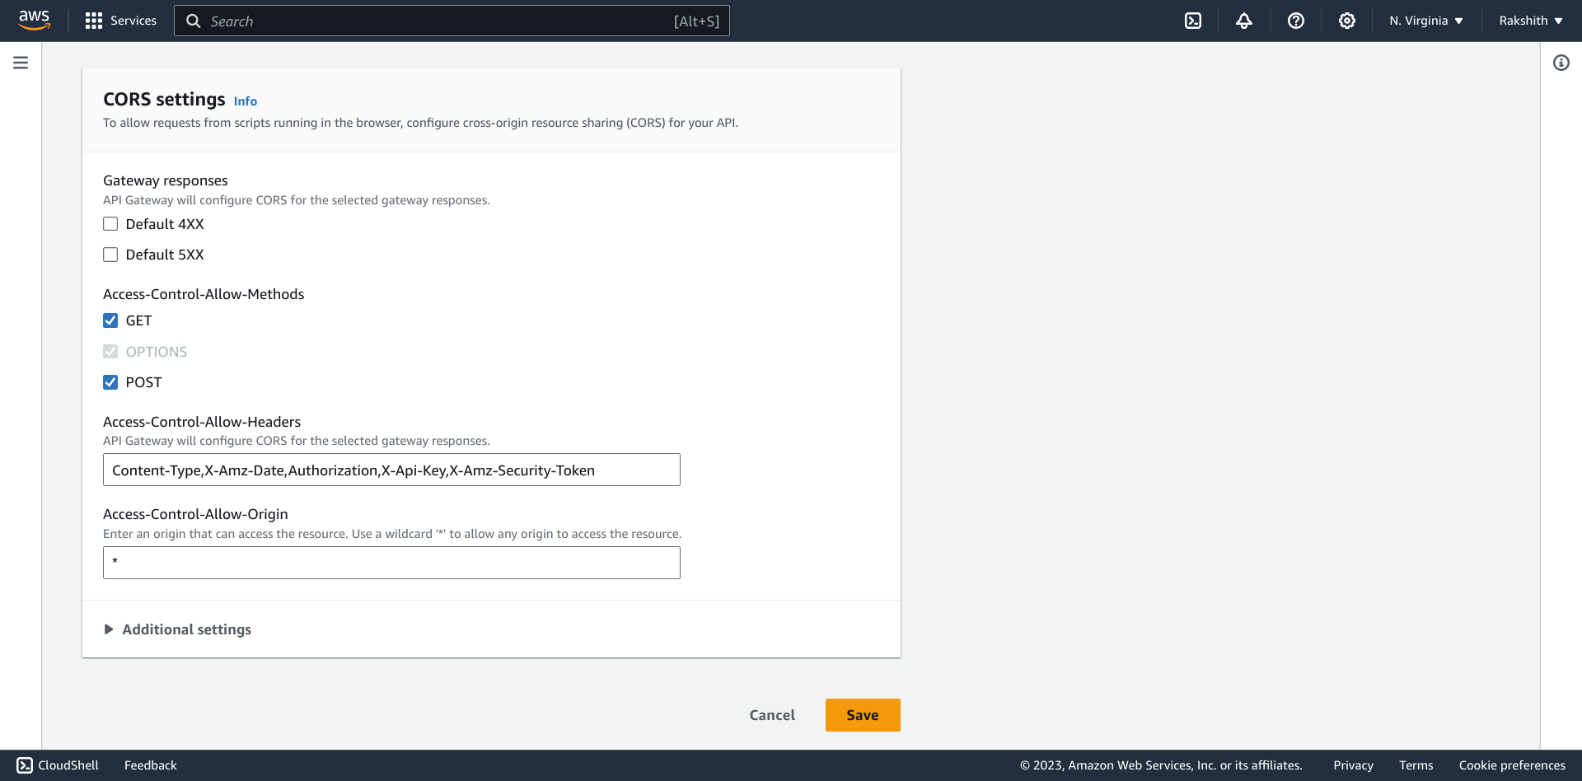
4)Enable CORS —- Select stage(prod) >> Enable CORS
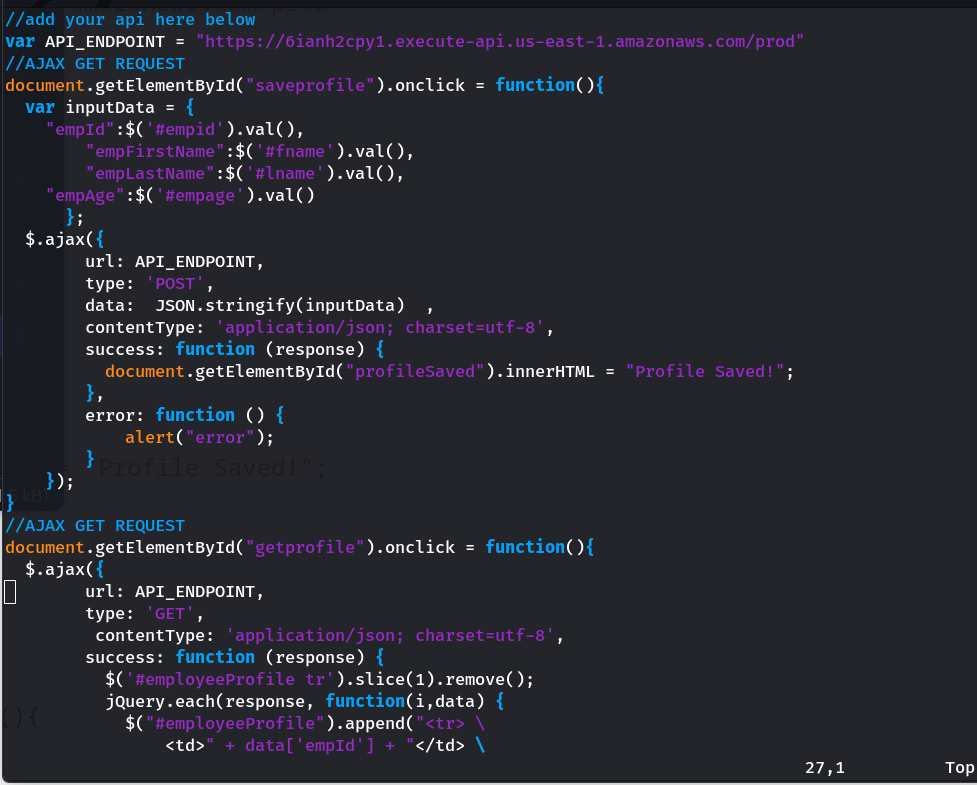
5)Grab the API URL from stages >> prod and paste it in scripts.js file as shown in snapshot and re-upload to s3 bucket
Replace API URL in first line at “var API_ENDPOINT”
Step 8: Access the Web App
Amazon S3 >> Buckets >> Dynamobuck1 >> properties >> static website hosting >> copy URL
Browser >> URL
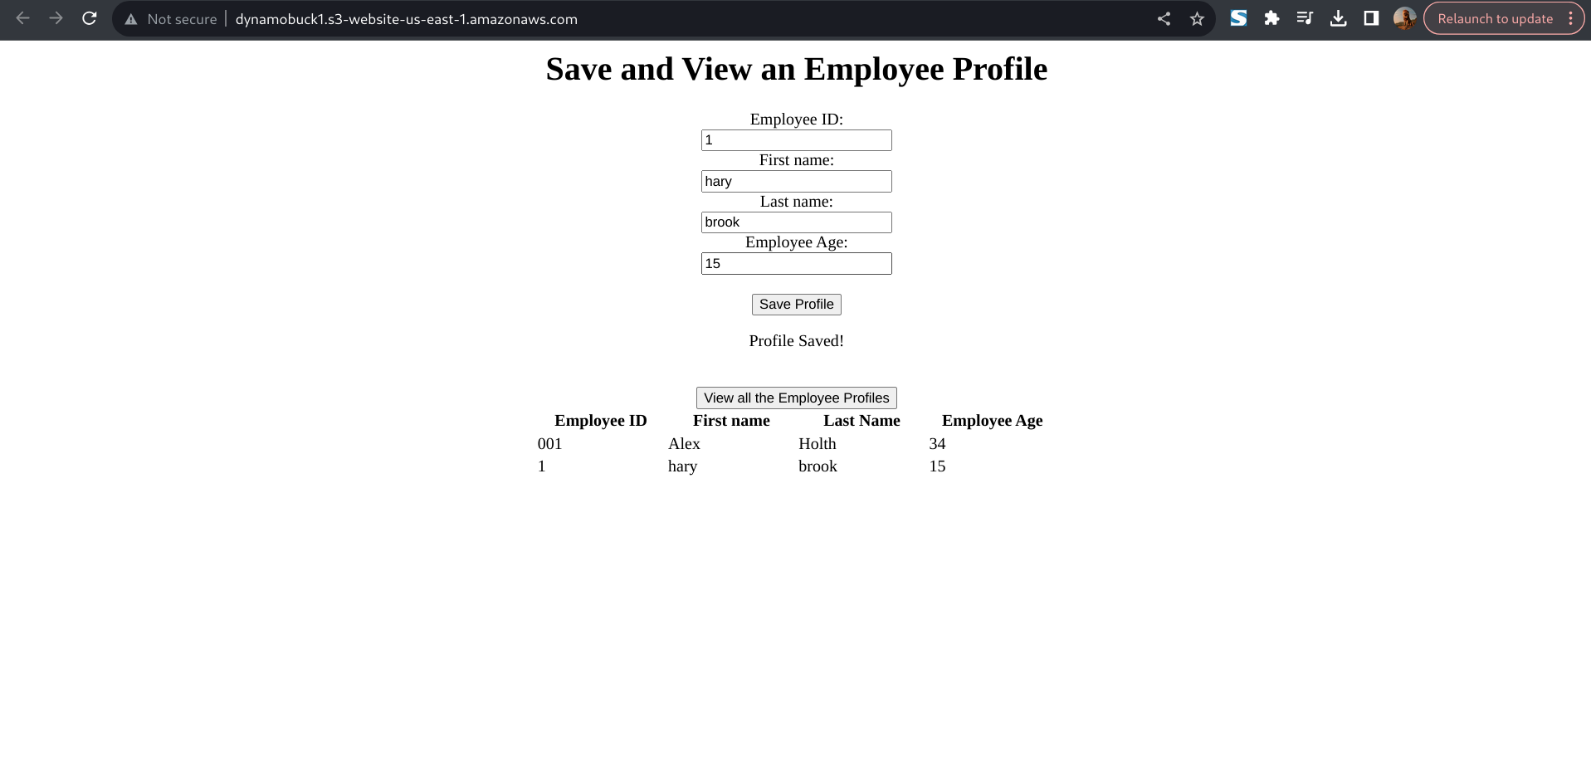
Test the html page by saving new profile or by viewing all the employees profile.